How To: Custom Colored Organic Balloon Garland
Last Updated: September 02, 2025|
How To: Tutorials Seasonal Items,
The organic balloon trend is here to stay and getting on board is easier than ever with our Organic Balloon Garlands 101 Tutorial. Unlike classic balloon decorations, organic designs thrive on untethered creativity and fluid lines. These balloon installations can be scaled from small tabletop accents all the way to wall-climbing outdoor art. The sky is the limit on what you can create with balloons and a few other supplies sold by burton + BURTON®.
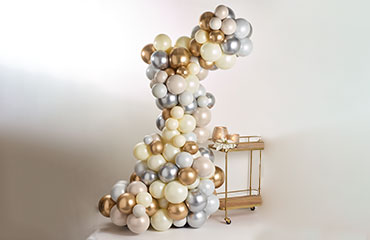
Here we will show how to create a DIY organic balloon garland perfect for highlighting a focal point such as a bar or dessert table at an upcoming special event. We love to mix colors and textures into the designs to add depth and interest. In this design, we used the new Qualatex® Chrome® balloons to add a brilliant opaque metallic finish. We took the design up a notch by double-stuffing balloons to fashion completely customized colors. Custom colors are always important when designing for weddings and corporate events where specific colors are needed. By offering custom double-stuffed balloons, you broaden your color catalog and provide customers the opportunity to create a perfectly curated look for their special event.
To add even more value to the design, live florals, greenery, or seasonal sprays can be added to the balloon garland. This produces the perfect chance to incorporate other unique features showcased at the event into the balloon décor.
Purchase everything you need here.
| Instructions |
instructions visual photos |
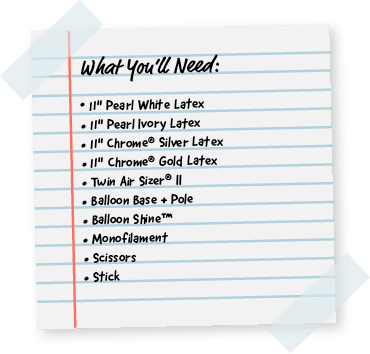
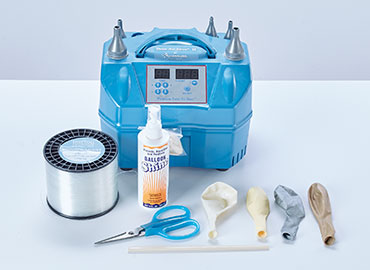
| 1. Double-stuff the balloons to achieve rich custom colors. Color combinations used in this design include: Chrome Gold inside Pearl White, Pearl Ivory inside Pearl White, and Chrome Silver inside White. Slide the first balloon on the stick and then the second over it. |
 |
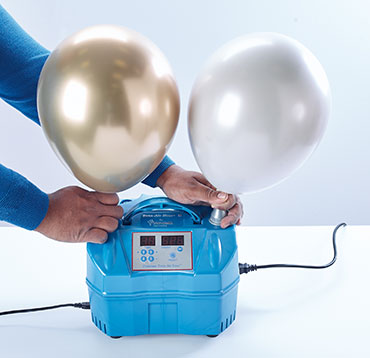
| 2. Air-inflate all balloons at various sizes for an organic look. When inflating, choose two contrasting colors to inflate simultaneously. |
 |
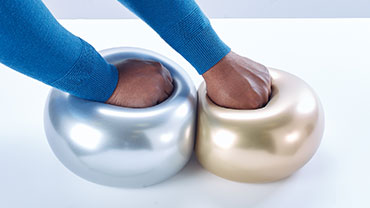
| 3. Once balloons are inflated, press them on a table to give them a round shape. |
 |
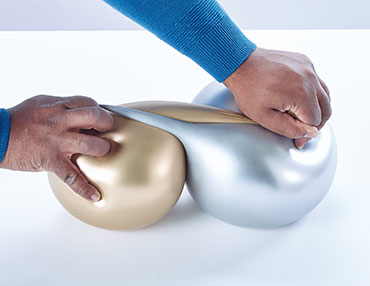
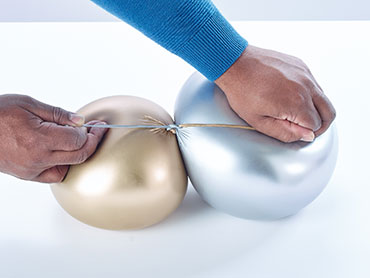
| 4. Stretch the neck of the balloons across one another and tie. |
 |
| 5. Hold balloons close to one another so there is little space when tied. |
 |
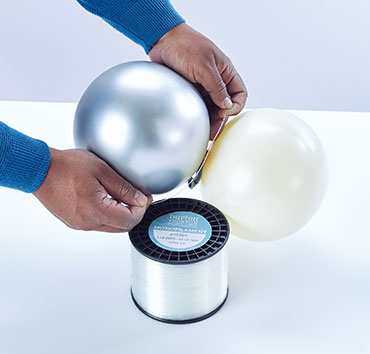
| 6. Attach monofilament to the necks of the balloons. |
 |
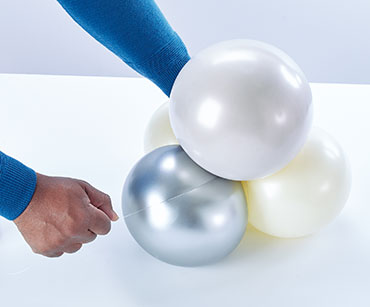
| 7. After inflating and tying two more balloons together, combine the two duplets by pushing the necks together and twisting two times to form a quad. |
 |
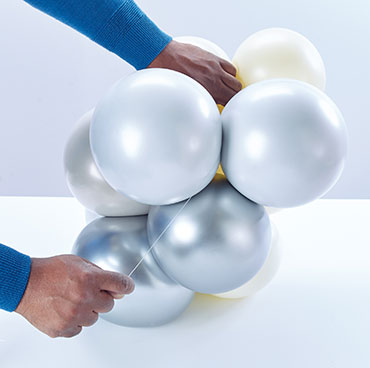
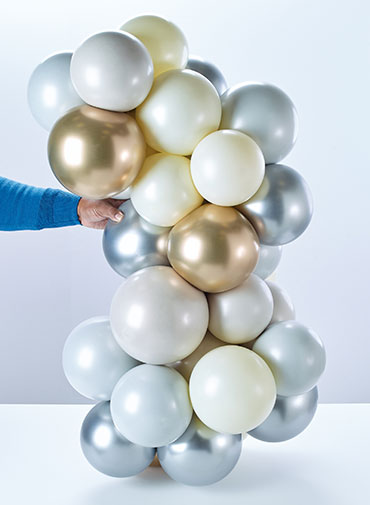
| 8. Continue the process of combining the duplets to form quads while wrapping the monofilament through the center of the balloons to secure. Repeat the steps until desired size and shape are achieved. |
 |
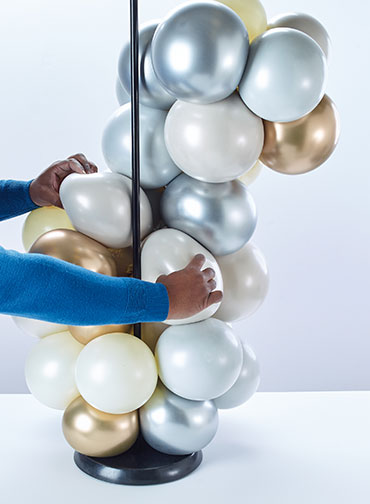
| 9. Attach balloons to a base and pole by pushing the center of the design onto the pole from the side. |
  |
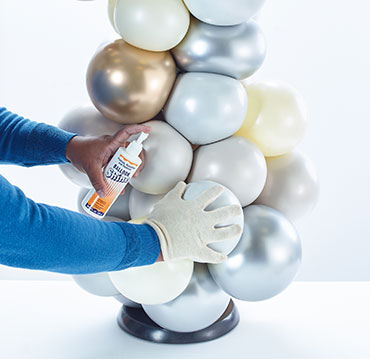
| 10. Spray Balloon Shine directly onto the balloons and rub in circular motions, with the glove, to distribute. Balloon Shine reduces oxidation and helps keep balloons shining 10 times longer. |
 |
We want to see your creations! Post a picture of your organic balloon garland on Instagram and tag us @burtonplusburton for a chance to be featured.
Share: