How To: Back-To-School Classroom Balloon Wreath
Last Updated: August 06, 2025|
How To: Tutorials
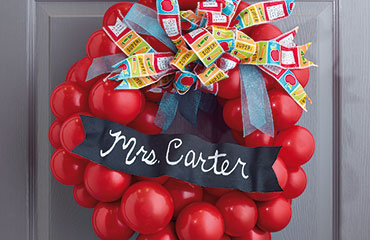
As the school year kicks off, teachers around the world pull out all the stops to create an exciting and interactive learning environment to help students grow and thrive. Create the perfect welcome by hanging a fun, air-filled balloon wreath. Balloons continue to be a top trend for 2019–2020 and this easy-to-create, customizable wreath can be made to match any classroom décor.
By air-filling balloons, the longevity of the wreath increases, making it the perfect seasonal statement for a classroom. Choose from burton + BURTON’s wide range of balloon colors and whimsical wired ribbon to create a custom look to match any theme.
Purchase everything you need here
-
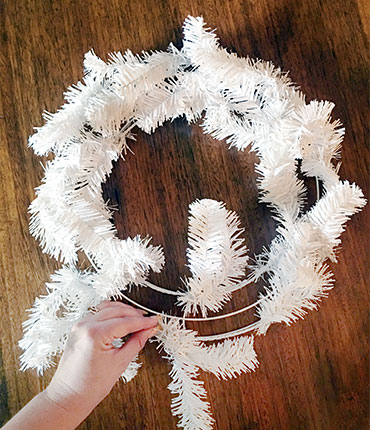
Start by bending all of the work wreath branches down flat to create an even framework for your balloon garland to rest on.
-
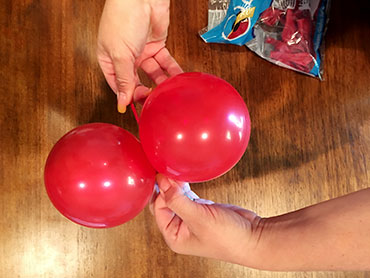
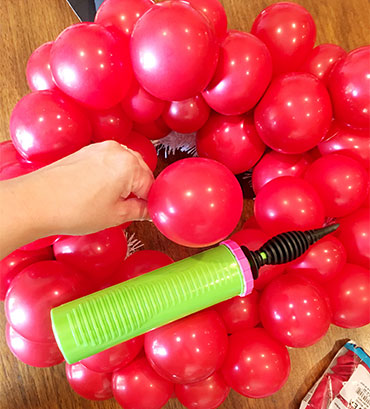
Double-stuff half of the Ruby Red balloons with Chrome Silver balloons inside. If you have trouble with this step, it may be easier to use a plastic stick or wooden dowel to insert one balloon inside the other.
-
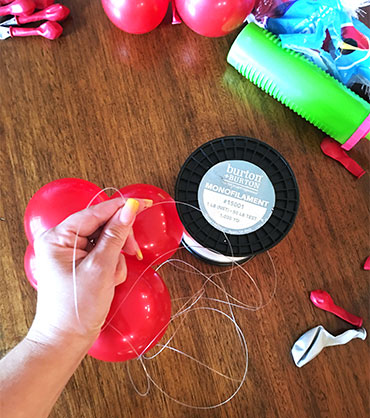
Using a hand pump or electric inflator like the Premium Twin-Air Sizer® II inflate the 5-inch balloons to various sizes, then tie into duplets, utilizing both the Ruby Red and double-stuffed colors. Make sure to push a small amount of air out to create a rounder shaped balloon ideal for organic designs.
-
String the duplets onto the monofilament, creating a small organic garland. For more information on how to create a latex organic balloon garland, watch this video.
-
Once the garland is around 3.5 feet long, overlay it on top of the work wreath frame, securing along the way with pieces of 260Q so it retains a circular shape.
-
Fill in any gaps with single 5-inch balloons by weaving them in with the extra neck of the balloon until the wreath is perfectly round.
-
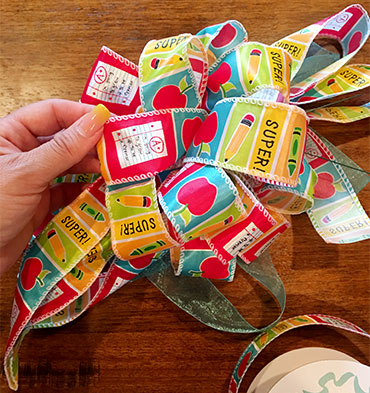
Cut around 3 yards of wired ribbon and 1.5 yards of sheer ribbon and create a standard bow by securing with floral tape-wrapped 22-gauge wire. For more information on how to create a standard bow, watch this video. Secure the bow to the wreath with a piece of monofilament.
-
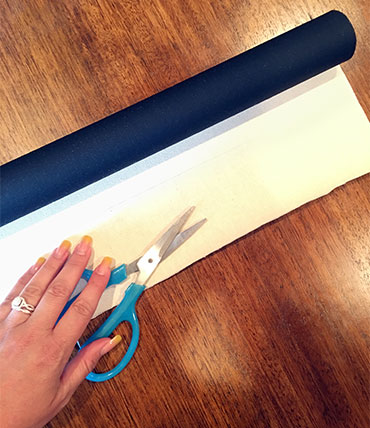
Roll out the chalk cloth and cut a section around 3.5 inches wide and 1.5 feet long. The length will depend on what phrase or name you want to feature on the wreath.
-
Fold each end of the chalk cloth and cut into a dovetail for a finished and professional look. For detailed instructions on how to cut a dovetail, watch this video.
-
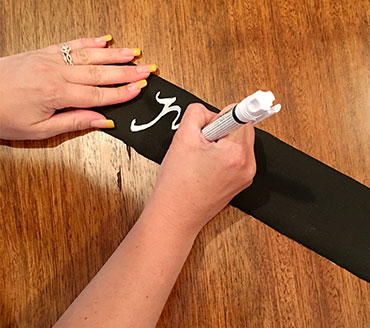
Use the chalk pen to write a personalized message on the chalk cloth. Make sure to let it dry before moving to the next step.
-
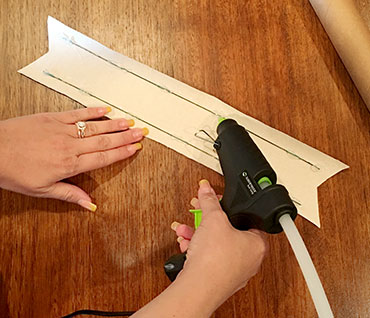
Cut two 1-foot pieces of 22-gauge wire and secure to the unfinished side of the chalk cloth using the hot glue gun on a low setting. Make sure to work your way down the wire, creating multiple secure points.
-
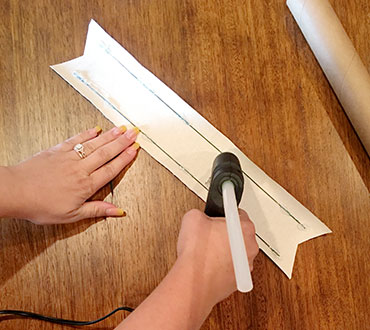
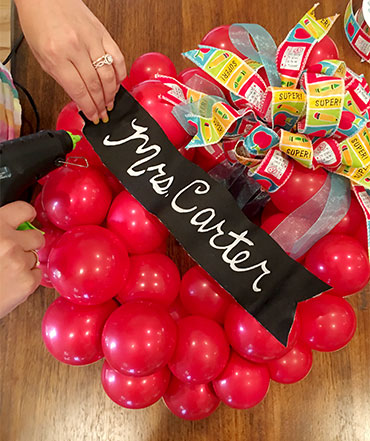
Once the glue has dried, gently bend the wire to create a waving banner effect in the chalk cloth and attach the banner to the front of the balloon wreath with the hot glue gun on the low setting.
-
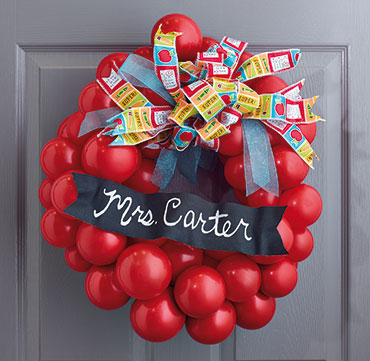
Hang and enjoy!
We want to see your creations! Post a picture of your balloon wreath on Instagram and tag us @burtonplusburton for a chance to be featured.
Share: